
Beginner’s Guide to Hay Production
Everything a first-time or scaling hay producer needs to understand about cutting timing, moisture management, equipment selection, bale formation, and storage — without the gaps that cost most beginners their first season’s quality.
Most hay quality problems are not weather problems. They are timing problems, equipment problems, or storage problems — all of which are preventable with the right knowledge before the first cut.
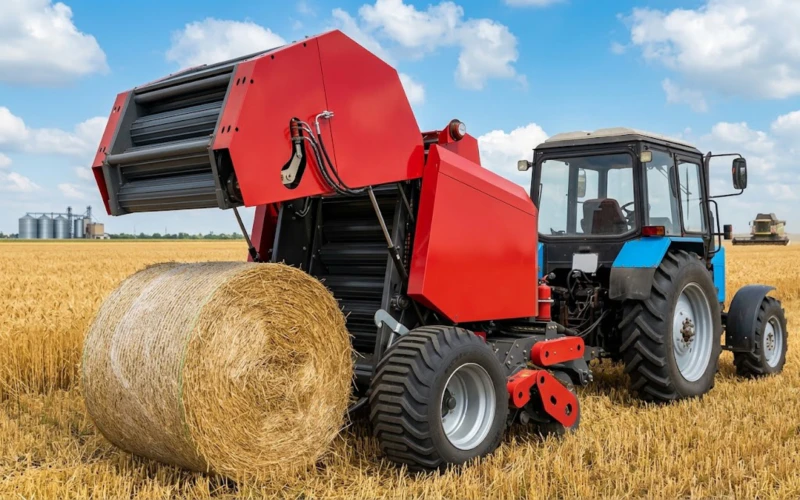
The hay baling process looks straightforward from a distance: cut the grass, let it dry, rake it into windrows, bale it, store it. Farmers who have been doing it for twenty years make it look effortless. What those years of experience have accumulated — and what no one explains to first-time hay producers — is a layered understanding of why each step has to happen in the right sequence, at the right time, with equipment that is correctly matched to the crop and the scale of the operation. When one of these elements is wrong, the whole system produces a result that looks like hay but performs like poor feed: brown on the outside, musty in the centre, low on protein, and unacceptable to the buyers or animals it was produced for.
This guide covers the complete hay production cycle from the perspective of small and medium farms — typically 20–300 ha of productive hay land — where a single operator or small team manages the complete harvest chain with a limited equipment fleet and a tight weather window. It is written for people starting their first hay operation and for people who have been producing hay for a few seasons but are not satisfied with the quality or consistency of what they are producing.
For the equipment options referenced throughout this guide, see our range of hay balers and forage harvesting equipment sized for small and medium farm operations.
1. Understanding Your Crop: What You Are Cutting and Why It Matters
Grass Hay vs. Legume Hay: Different Rules Apply
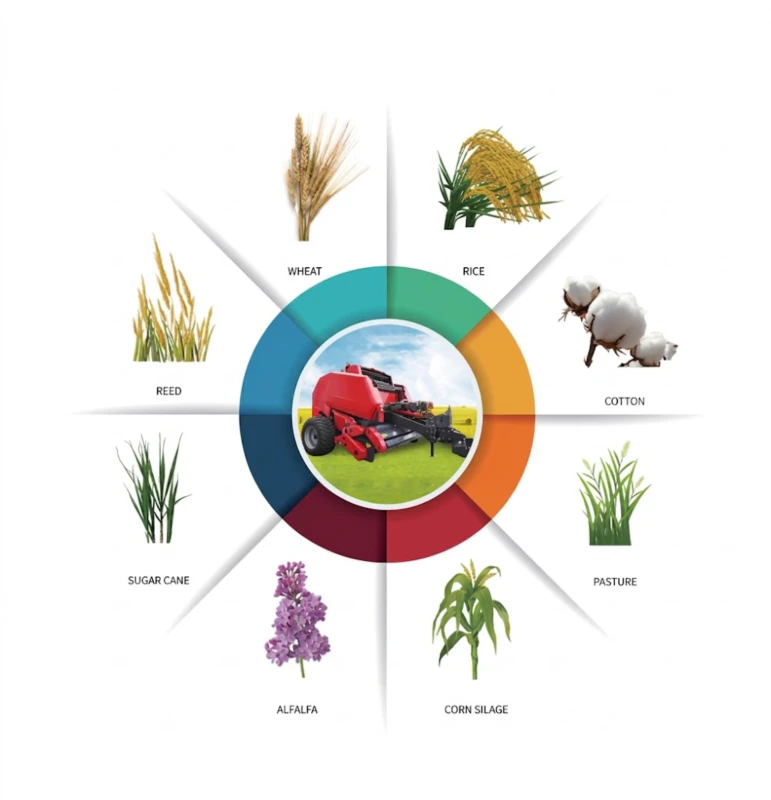
The single most important thing to understand before planning a hay operation is what type of forage you are working with, because grass hay and legume hay have fundamentally different requirements at every stage of the production cycle. Grass hay — ryegrass, timothy, bromegrass, prairie grass — is relatively forgiving of handling: the leaves are flexible, they dry at moderate speed, they tolerate raking at a wider moisture range without shattering, and they maintain acceptable quality through moderate weather variability after cutting. Legume hay — alfalfa, clover, vetch — is the opposite: the leaves are fragile, they dry unevenly compared to the stems, they shatter readily when handled below 30% moisture, and the narrow window between optimal baling moisture and over-dry brittle material demands precise timing and fast equipment operation.
For small and medium farms starting their first hay operation, grass hay and grass-legume mixed swards are the recommended starting point. The tolerance for timing error and equipment imprecision is wider, the risk of catastrophic quality loss from a single mistimed operation is lower, and the knowledge base transfers to legume production once the fundamentals of cutting, drying, and baling management are established. First-season legume operations on large acreages, where a single weather event can ruin the entire production, impose a level of time and equipment pressure that is difficult to manage without prior hay production experience.
Cutting Stage: The Decision That Determines Everything Downstream
The cutting stage — the maturity of the crop at the time of first cut — determines the crude protein content, digestibility, and physical fibre structure of the finished hay. Early cutting (vegetative to early heading for grasses, bud stage for alfalfa) produces high-protein, highly digestible, soft-textured hay that commands premium prices in dairy and equine markets. Late cutting (full seed head emergence for grasses, full bloom for alfalfa) produces lower-protein, higher-fibre, harder-textured hay suited to beef cattle and horses on maintenance rations. The decision of when to cut is not just about maximising yield per cut — late-cut hay yields more dry matter per hectare than early-cut hay, but the additional yield consists primarily of indigestible structural fibre rather than the protein and digestible energy that buyers pay for. For most commercial hay operations, cutting at early heading for grasses and at late bud to first flower for alfalfa delivers the optimum balance of yield and quality.
2. Cutting and Conditioning: Building the Foundation for Fast Drying
Why Conditioning at the Point of Cutting Changes Everything
A grass or legume stem is covered by a thin waxy cuticle layer that slows moisture evaporation from the plant interior by 60–70% compared to a stem with its cuticle disrupted. An unconditioned cut stem — one where the cuticle is intact — can take 48–72 hours to reach baling moisture in good drying conditions, because almost all moisture movement must occur through the cut end of the stem rather than through the side surfaces. A conditioned stem — one where the cuticle has been mechanically crushed or abraded — dries from all surfaces simultaneously and can reach baling moisture in 12–24 hours under the same conditions.
A mower conditioner — an implement that cuts and conditions the crop in a single pass — achieves this cuticle disruption immediately after cutting, while the stem surfaces are still fresh and most responsive to mechanical treatment. Conditioning applied to fresh-cut material is consistently more effective than tedding or separate conditioning applied hours later, because stem surfaces begin sealing through oxidation and surface drying within hours of cutting. The 30–50% reduction in field drying time that conditioning provides is the most significant practical advantage available to small and medium hay producers who need to complete the cutting-to-baling cycle within tight weather windows.
Swath Width: The Drying Speed Trade-Off
The swath width setting on your mower conditioner determines how thinly the cut material is spread across the field surface. A wide swath — 1.8–2.2m — spreads material in a thin, aerated layer that maximises sun and wind contact for fastest drying. A narrow swath — 0.8–1.2m — concentrates material in a denser layer that dries more slowly but forms a windrow ready for the baler with minimal or no raking. For small and medium farms with a one-person operating crew where simultaneously managing mowing and raking with a single tractor is impractical, the narrow swath setting that produces a baler-ready windrow directly from the mower conditioner is often the most operationally practical choice — even if it is not the fastest drying option. Match your swath width setting to the width of your baler’s pickup, aiming for a swath that is 80–90% of pickup width.
3. Raking: The Step Most Small Farms Do Too Early or Too Late
The Optimal Raking Window
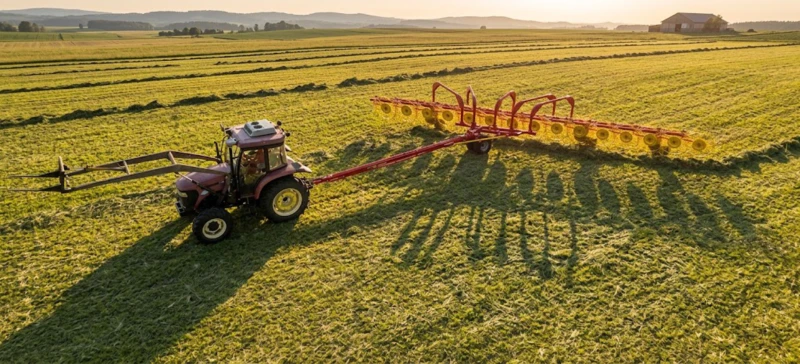
Raking serves two functions: it turns and fluffs material to expose it to sun and wind for continued drying, and it consolidates wide swaths into narrower windrows that the baler can pick up cleanly. The timing of raking relative to the moisture content of the crop at the time of raking is one of the most common quality mistakes in small farm hay production. Raking too early — when the crop is still above 40–50% moisture — matts wet material into a dense windrow that excludes air and slows drying rather than accelerating it. Raking too late — when the crop is below 25% moisture for legumes or below 20% for fine-stemmed grasses — causes shattering of the dry leaf material at tine contact, with leaf loss of 5–15% on alfalfa and 2–6% on grass.
The optimal raking window for most grass hays is 30–40% moisture — when the material is sufficiently dry that raking will improve further drying, but moist enough that the leaves retain flexibility and do not shatter under tine contact. For legume hays, the optimal window is narrower: 35–45% moisture, which typically occurs 18–30 hours after cutting in good drying conditions. A practical rule of thumb is to rake when the material feels limp and pliable rather than either dripping or crisp — stem flexibility is a better field indicator than trying to estimate moisture percentage from appearance alone.
Choosing the Right Rake Type for Small Farms
For small and medium farms producing primarily grass hay or mixed swards, a finger-wheel rake provides the gentlest tine action and the lowest leaf loss rate — important for legume-containing swards. Finger-wheel rakes are ground-driven (no PTO required), simple to maintain, and available in working widths from 4m to 12m that cover the range from small farm to commercial scale. A horizontal hay rake — the 9LH-12 series at 12m working width — provides the highest throughput for operations where coverage rate is the primary constraint, with 168 spring steel tines that handle diverse material types gently across the full width. For small farms with less than 50 ha per cut, a 4–6m finger-wheel rake or a smaller horizontal model is sufficient and more economical to operate than the wide commercial models designed for large-scale operations.
4. Baling: Equipment Selection, Moisture Targets, and Common Mistakes
Choosing the Right Baler for Your Scale
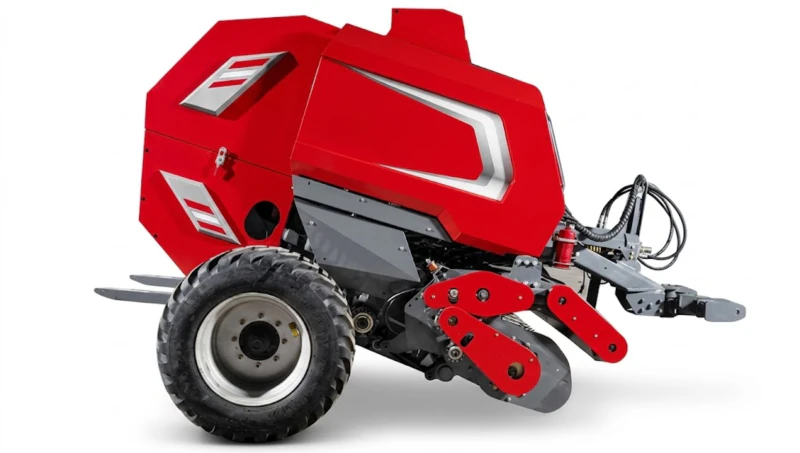
For small and medium farms in the 20–300 ha range, a round baler is almost always the practical choice over a large square baler. The capital cost is lower, the tractor power requirement (typically 48–100 kW) matches the existing fleet on most farms in this size range, a single operator can manage the full baling cycle, and net-wrapped round bales tolerate outdoor storage significantly better than twine-bound square bales. The key selection variables within the round baler category — pickup width, chamber type, and density control system — determine whether the baler protects hay quality through the baling process or introduces variability that undermines the work done in the cutting and drying phases.
Pickup width should match or exceed the widest windrow you expect to produce. For farms running a mower conditioner with a 1.5–2.0m swath setting, a 1900–2240mm baler pickup collects the full windrow cleanly. Chamber type — roller drum versus belt — matters most for legume crops where density uniformity from core to surface affects bale integrity under stacking. For grass hay and mixed swards, either chamber type performs adequately. Density control — manual pressure versus sensor-controlled — determines bale-to-bale consistency, which matters most when bales are sold by the bale rather than by weight. Sensor-controlled systems maintain target density regardless of windrow variation; manual systems require an experienced operator to compensate for material density changes through field observations.
The Baling Moisture Window: The Most Critical Single Decision
The moisture content of the crop at the time of baling determines the long-term quality of the finished hay more than any other single variable. The safe baling moisture range for net-wrapped round bales is 12–18% for grass hay and 12–16% for legume hay. Above these limits, bales generate internal heat during the first 2–4 weeks of storage as microbial activity consumes fermentable carbohydrates in the still-moist material. This heating destroys heat-damaged protein — visible as brown or caramel-coloured material when a bale is opened — reduces digestible energy, and can in extreme cases generate enough heat to cause spontaneous combustion in tightly stacked hay storage. Below 10% moisture, grass hay quality is largely preserved but the material becomes dusty and unpalatable; below 12% for legumes, leaf shattering during baling causes significant dry matter loss.
Quick moisture check without a meter: Twist a handful of material from near the centre of a windrow and hold it for 10 seconds. If your hand feels noticeably damp, moisture is above 25% — not ready. If the material feels cool but not damp, and stems bend without cracking, moisture is likely 18–25% — approaching ready. If stems crack audibly when bent, moisture is likely below 15% — bale immediately or risk shattering loss. A calibrated forage moisture meter is more reliable but this field test is adequate as a go/no-go check when time is short.
The PTO Shaft: The Link That Small Farms Most Often Underspecify
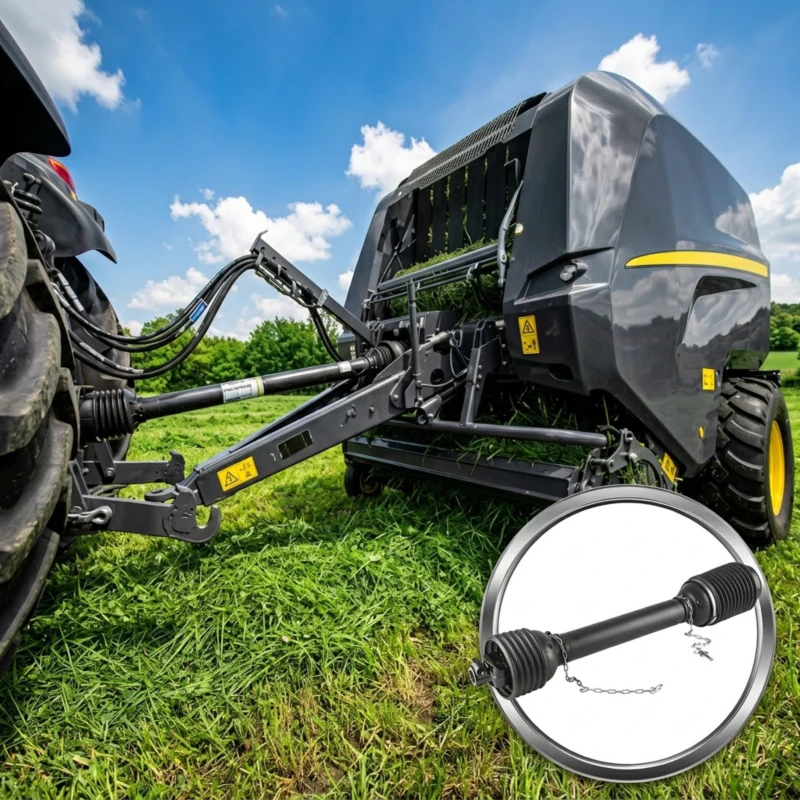
The round baler draws all its mechanical energy — pickup drive, chamber compression, net wrap system — through the PTO driveshaft connecting the tractor to the baler. On small and medium farms where hay baling is a seasonal operation and the baler may sit unused for 8–10 months between seasons, the condition of the PTO driveshaft is often the least-monitored component in the entire system. A shaft with worn universal joints, inadequate lubrication in the telescoping splines, or a cracked guard from winter storage is a breakdown waiting to happen — and a breakdown during the 6–8 hour weather window that separates bale-ready hay from over-ripe, over-dried, or rained-on material is one of the most costly events that can occur in a hay season.
A correctly specified pto shaft matched to your baler’s operating speed and torque specification, with a friction-clutch overload device and an intact full-length safety guard, should be one of the first pre-season inspection items every year — not an afterthought. The inspection takes 15 minutes. Replacing a shaft that fails in the field takes 2–3 hours if you have a spare on hand, or 2–3 days if you have to order one. The cost difference between those two outcomes is significant enough to justify a pre-season inspection protocol that would prevent the field failure entirely.
5. Storage: Where Most Small Farms Lose the Quality They Built in the Field
Net Wrap and Outdoor Storage: What You Can Realistically Expect
Net-wrapped round bales stored correctly outdoors lose 5–12% of dry matter over 6–12 months, depending on rainfall, temperature variation, and storage surface conditions. This is a manageable loss for most operations — acceptable when the alternative is the capital cost of covered barn storage that exceeds the value of the saved dry matter. Understanding what “stored correctly” means makes a significant difference to where in the 5–12% range your actual losses fall. Bales stored on a concrete pad or well-drained gravel hardstand lose 5–7%. Bales stored on bare soil or turf — where soil moisture wicks into the bottom of the bale — lose 10–18%, heavily concentrated in the soil-contact layer. The bottom 100–150mm of a soil-stored bale can have 50–60% higher dry matter loss than the bale average when opened, creating an inconsistently fed bale that wastes feed cost.
The practical minimum for outdoor storage is a well-drained hardstand surface — crushed gravel at 100mm depth is adequate and inexpensive for most small farms. Placing bales end-to-end in rows (rather than touching side-to-side) allows air circulation between bales that reduces moisture accumulation at the contact zones. Orienting rows in the prevailing wind direction rather than across it improves air movement through the storage area. These low-cost site management practices reduce the upper end of the dry matter loss range to 8–10% even in wet climates, which for most small farms is the difference between acceptable and unacceptable storage outcome.
When to Invest in Covered Storage
The investment threshold for covered storage — a hay shed or barn — is reached when the value of dry matter saved annually exceeds the annualised capital cost of the structure. A simple calculation for small farms: if you store 500 bales at 300 kg each and USD 150 per tonne hay value, your total inventory is 75 tonnes at USD 11,250 value. A 10% dry matter saving through covered storage versus outdoor hardstand storage saves USD 1,125 per season. A basic hay shed covering this volume costs USD 15,000–25,000, with an annualised cost over 20 years of USD 750–1,250 per year. The economics of covered storage become positive at hay values above USD 100–120 per tonne for operations storing 300+ tonnes annually. Below these thresholds, quality outdoor storage management delivers acceptable results at much lower capital commitment.
Five Things That Damage Stored Bales Most
Baling above 18% moisture — internal heating begins above this threshold and cannot be reversed once the bale is formed and wrapped. The only fix is to bale at the right moisture in the first place.
Net wrap damage — punctures or tears in the net wrap allow water to enter the bale at the damage point. Inspect bales monthly during outdoor storage and patch any visible damage with adhesive tape rated for UV exposure.
Direct soil contact — the most prevalent and most preventable dry matter loss mechanism. Crushed gravel, used tyres as base runners, or wooden pallets all break soil-to-bale contact at low cost.
Bale-to-bale side contact in rows — touching sidewalls trap moisture and create a zone of high humidity between bales that accelerates surface mould on the bale at the contact point.
Shaded storage areas — trees, buildings, or hill shadows that prevent the sun from drying moisture accumulated on bale surfaces after rain events create persistent damp zones that accelerate surface deterioration through the season.
6. Building a Seasonal Checklist: What to Do and When
The most reliable way to avoid the timing and preparation mistakes that damage small farm hay quality is a written seasonal checklist that distributes pre-season preparation tasks across the weeks before cutting begins. The following checklist covers the essential tasks for a small farm running one tractor, one mower conditioner or rake, and one round baler.
| Timing | Task |
|---|---|
| 6 weeks before cut | Inspect and replace mower conditioner blades and disc pads if worn below 80% of original size. Order replacement parts now — delivery times for wear items during peak season can be 2–3 weeks. |
| 4 weeks before cut | Inspect baler pickup tines, replace any bent or missing tines. Check net wrap path for debris and guide roller condition. Test sensor density system with a short baling run and verify calibration. |
| 3 weeks before cut | Inspect PTO shaft guard for cracks, deformation, or missing sections. Check universal joint play and grease all lubrication points. Verify that shaft length is correct for your tractor-baler hitch geometry across full lift range. |
| 2 weeks before cut | Prepare storage site: grade and compact hardstand surface if needed, ensure drainage away from bale rows, clear shade-creating vegetation from bale storage area. |
| 1 week before cut | Check 7-day weather forecast and plan cutting date to maximise the drying window before the next rain event. Target a 4–5 day rain-free period minimum for grass hay, 3–4 days for conditioned legume hay. |
| Day of baling | Check crop moisture with a forage moisture meter at multiple windrow locations before starting the baler. Do not rely on calendar timing or appearance alone. Record moisture at start and check hourly as conditions change through the day. |
| After each season | Clean all crop residue from baler chamber, pickup, and net wrap system. Apply rust-inhibiting oil to exposed metal surfaces. Store baler with pickup tines up and hydraulics fully retracted. Record any performance issues observed during the season for pre-season address next year. |
Starting Your First Hay Operation — or Upgrading an Existing One?
Our team works with small and medium farms across a wide range of hay crops and operating scales. We can help you select the right baler, pickup width, and tractor match for your first season or your next equipment upgrade.